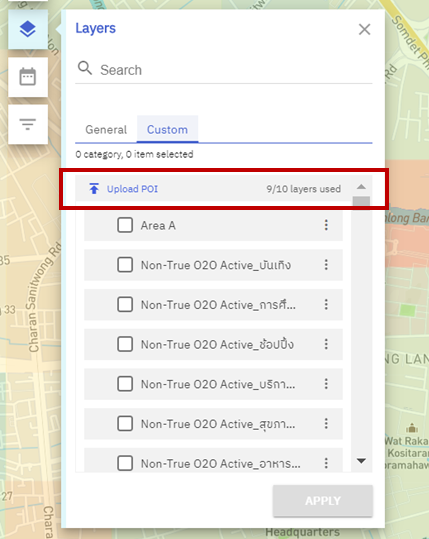
With super user permission, you can upload your own set of places (Point of interests – POIs) to GeoPulse dashboard. The uploaded POIs data will be added to Custom tab under Layers function and be visible by all users within your company. Each department has different quota of POI layers.
Superusers is able to upload, rename and delete POIs in their respective department/company while normal users can only view POIs uploaded by their superusers under their department/company.
Upload Custom POI
To upload custom POI: (available only for superusers)
- Click Layer Filter icon to open layer filter menu.
- Navigate to the Custom Tab
- Click on ‘Upload POI’ and go through the upload wizard:
- Select a .csv file or drag and drop the file on to GeoPulse
- Select a column representing Latitude
- Select a column representing Longitude
- Select a column representing your POI’s title
- Confirm upload summary
- The uploaded POI will be shown on GeoPulse automatically at the top row.
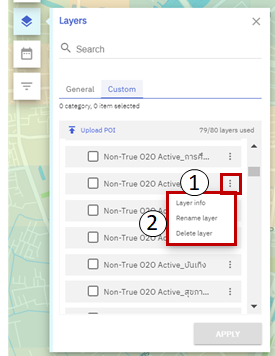
View Layer Info
To view layer info for each custom POI layer:
- Click Layer Filter icon to open layer filter menu.
- Navigate to the Custom Tab.
- Click on more info button (1) and select ‘Layer info’ (2).
Rename Custom POI
To rename custom POI: (available only for superusers)
- Click Layer Filter icon to open layer filter menu.
- Navigate to the Custom Tab.
- Click on more info button (1) and select ‘Rename layer’ (2).
- Specify the layer name.
- Custom POI will be renamed.
Delete Custom POI
To delete custom POI layer: (available only for superusers)
- Click Layer Filter icon to open layer filter menu.
- Navigate to the Custom Tab.
- Click on more info button (1) and select ‘Delete layer’ (2).
- Click confirm to delete the selected POI layer.
- The selected POI will be permanently removed from the Custom tab.